Beginner tips to Drywall finishing

Tape drywall like a pro
Save yourself $s by taping your own walls. We'll show you how. This article shows you everything you need to get perfectly smooth walls, without having to worry about nail pops, cracks and bad joints later. We take a beginner DIY approach, so even if you ve never used drywall tools before, you can get good results on your walls.

Taping drywall can be a frustrating, gut-wrenching experience. Nagging flaws will show up right after painting and even months later. Nail pops, corner-bead cracks and bad joints will plague your walls forever.
To make your next taping job more successful, we’ve come up with a novice-friendly guide for getting good results and how to mud drywall. We’ve simplified professional techniques so you can learn them easily and recommended the basic tools and materials you’ll need to achieve smooth, flat walls ready for paint.
Since 70% percent of the cost of a professional job is labor, taping your walls yourself can save you several hundred dollars, even on small jobs. The key is a methodical, step-by-step approach with the proper tools and materials. Otherwise, taping will drive you nuts.
We’ll show you how to avoid the most common rookie mistake: heaping on drywall mud and then counting on a massive and filthy sanding effort at the end to rectify mistakes. We’ll also show you how to gradually build up layers, feather edges to avoid ridges and knock off high areas of freshly applied mud.
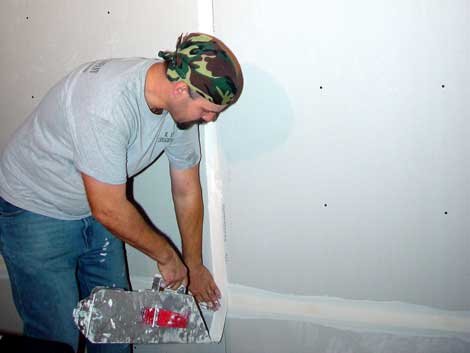
You’ll find a mind-boggling assortment of gimmicky taping tools at home centers. The truth is, most aren’t worth having and you can do an excellent job with just the ones we recommend.
A banjo is essential for all but the smallest taping jobs for dispensing mud saturated tape right onto the drywall joints.
Banjos can speed up and improve the job. They’re a must for larger rooms with lots of corners. But for small jobs, skip the banjo, and if you only have a few corner beads to do, nail them on by hand and skip using a clincher too.

. Four-inch flexible putty knife for small filling jobs and applying second- and third-coat mud to angles inside corners. Six-inch flexible putty knife for larger filling jobs, embedding tape and filling fastener holes.

“Potato masher” mixer for hand-mixing a bucket of mud quickly and thoroughly.

Mud pan for convenient dispensing of patching, fastener hole and corner mud.
Just as with drywall mud tools, there are many new drywall products on the market purporting to make taping easier. But talk to a pro and you’ll find that few of them work any better or are any more durable than the old-fashioned taping supplies like paper tape and a 5 in. knife.
Pick up enough corner beads to cover every corner with a single bead—no splicing!—plus one or two extras to replace mistakes. One roll of paper tape is usually plenty for the average-sized room, but they’re only a couple of bucks, so get two in case you come up short. The most time consuming, common and skilled part of finishing a room are the 3 way corners.

the easiest way to quickly do them and not be worried about cracks or un crisp lines is by using the 3Way. Since you're reading this and are already on 3Way.ca website you'll know where to get them!